The Cooler Master Quickfire Stealth Keyboard

I’ve been spending way too much time over on /r/mechmarket recently for my own good. I rarely buy anything, it’s just fun to look. However, when I saw someone selling their Quickfire Stealth with Cherry MX Reds for $45, I really couldn’t pass it up. Not only did I already have some knowledge of the goodness of CM’s boards (thanks to my CM Rapid-i with Browns, review in the future!), but I hadn’t had any boards with linear switches yet, something I definitely want to try for myself, both for the “gaming” that it’s so touted for, as well as for general usage as a light switch. And oh boy are they light.
(I also picked up separate sets of White and Mint PBT keycaps on mechmarket, which are featured on this board. Hopefully a review on them later.)
This is a tenkeyless board, which means that it drops only the numpad (unlike my 60% Pok3r). Although you can’t really tell due to the blank keycaps, it features a bunch of function keys to handle things like media keys that might have been dedicated keys in a full-size board. It also does the Cooler Master thing of letting you quickly change the repeat rate, which I still haven’t found a use for.

The board itself carries some heft–apparently it has steel reinforcements inside (I wouldn’t know, I haven’t opened it up). Trying to flex it as hard as I can causes some unpleasant plastic creaking, so I don’t recommend flexing it for no reason!

The whole board is coated in this rubbery finish. It feels awesome to the touch and looks beautifully matte. However, hand oils absolutely love to cling to it. I’ve read that dust and other particles like to cling to it as well, so make sure to practice proper keyboard hygiene. CM likes to keep their boards clean as well; the only noticeable branding is hidden on the back of the keyboard, keeping the front and top very “stealth” indeed.

Cooler Master includes nice braided USB cables with all of their keyboards, something other keyboard manufactures should definitely adopt, especially on keyboards more expensive than CM’s offerings! Unlike my Rapid-i which has a port on the back, the Stealth has cable routing underneath. This is nice in theory, but there are problems with the implementation. The provided cable is almost too thick for the routes, and it is unnecessarily difficult to get the cable into the routes.
Furthermore, the space for plugging in the mini-USB cable is way too small; it’s really hard to plug in the cable unless you’ve already inserted it into one of the routing holes, which makes it even more difficult to plug it in as the routing holes grip on to the cable tightly enough such that pulling it through to fit into the port is annoying. Of course, for most people you’d deal with these annoyances once and never do it again. If you’re like me though and unplugging your keyboards often, whether to transport them or just to swap keyboards, it’s really frustrating.

Underneath my awesome PBT caps (the board comes with some thin ABS nonsense, replace them quickly) are the reason that I bought this keyboard in the first place. Cherry MX Reds are a linear switch, which means you don’t feel anything until you’ve bottomed out the keys. That’s not completely true though. Cherry’s Reds aren’t perfectly smooth, as you feel a sort of “grinding” as they slide down. I don’t mean that negatively though: I actually really like that sort of texture, it personally adds to the dampened feel for me. Perhaps in the future I’ll have a board with Gateron Reds and be able to try pure smoothness.
I’ve played games with this keyboard, including shooters like The Division or puzzle-platformers like The Swapper. It works absolutely fine for gaming. I don’t know if I perform better with Reds, but I certainly enjoy using them. However, as I’m nearing typing this entire review with this board, my hands are cramping up quite badly. Of course it’s the end of a long day so perhaps I’m just tired, but the lack of feedback makes it too easy to bottom out and therefore stresses out my hands more than necessary. Plus, the lightness results it a lot of mispresses when I type quickly, which means stretching over the backspace, which means more fatigue in the long run.

This is a really attractive keyboard, and the price I got it for (in excellent condition save for some stabilizers that needed greasing) makes me glad that I have it for playing video games. At the moment though, typing is a real no-go (even my Browns got me through two all-nighters of programming, much less half an hour of blogging). Maybe I’ll get used to typing much lighter with no feedback though. Of course, switches are a personal thing, so if you’re already leaning towards Reds, this (and CM’s other similar offerings) is an awesome choice.
A strange rubber-dome...
I’m currently visiting my parents in San Francisco during spring break. While here I decided to further pursue my newfound hobby of keyboarding and see if I could find our old, Windows 95-era keyboards lying about.
I found two! They’re these off-brand “Digital” rubber-dome with slider keyboards. They got the standard beige aesthetic of most of the old keyboard you’ve seen. One of them is pretty messy and begs to be left alone, while the other (the one I’m currently typing on) is in decent enough shape.
A lot of the keys don’t work, from nearly all of the right-side modifiers (thank gawd Enter still works) to half of the navigation and arrow keys as well as a couple of numpad keys for good measure. Thankfully the 60% core works fine, which means typing can be done (although you better have your Vim shortcuts down as you’re certainly not going to get any use out of the function cluster!).
Like many of these types of keyboards, it doesn’t feature a Windows key. As I’m currently using a MacBook I didn’t think this would be much of a problem until I rudely discovered that none of the keys served as a Command key. Thankfully OSX surprisingly lets you remap modifiers in the global settings, including the Capslock key, so now I happily have the Capslock key doing all of my Command work.
The keys feel honestly not bad for a rubber-dome keyboard. Of course I would of preferred to have hit gold and found a buckling springs keyboard, but it’s fine. Like most rubber-dome keyboards, it’s pretty much either up or down, there’s no way of not bottoming out. Thankfully though it’s got the high-travel that many rubber-domes from that era had, versus the flat-as-possible domes we’re given these days.
The spacebar funny enough uses a wire stabilizer (maybe this is not funny and all keyboards of this time do this). It ends up feeling a lot snappier than the other keys because of this, and has a suiting sound as well. Not that the rest of the keys are terribly mushy; it’s definitely a soft bottom, but it doesn’t feel unpleasant by any means.
I think this exercise has given me a much further appreciation of what a mechanical keyboard offers, while also making me realize that it’s definitely unfair to dismiss rubber-domes outright. It also has made me realize what can happen if you don’t clean your keyboards, so I definitely recommend doing that…
The Pok3r Mechanical Keyboard

I haven’t even been into mechanical keyboards for more than a month now—checking out my Amazon purchase history reveals that I had only ordered my CM Quickfire Rapid-i with Browns just three weeks ago (hopefully a review of that keyboard once I get back to my apartment). It didn’t take long to hook me though, and the Poker series of keyboards (as well as the Cherry MX Clear switch) had me intrigued before I even realized that most keyboards used mini-USB (why??).
Specifically I have with me the Pok3r mechanical keyboard, the white-board white-LED backlit model with ABS keycaps. I personally bought it from MechanicalKeyboards.com, but I’ve heard that Massdrop.com has offered it in the past (with blue LEDs, ooh). As I mentioned, it’s outfitted with Cherry MX Clear switches, a tactile non-click switch with considerable more presence than the Browns in my QFR.

Right out of the box it’s apparent how small the Poker is, being a 60% keyboard. It’s great how much they’ve managed to trim the bezel surrounding the keys, especially compared to monstrosities such as the Ducky Mini. This does mean that there’s nowhere to rest your hands on the keyboard save for the keys themselves (sometimes I’m at a loss as what to do with my thumbs, as I out of habit usually rest them below the spacebar). It really does help with the floating keys look though, making the keyboard look tall rather than expansive.
One thing I will note is that due to the particular construction of this keyboard, it suffers greatly from something known as ping, where certain keys when pressed and released sharply will give off a very metallic vibration noise. Personally I don’t mind it (I actually think it sounds cool) but I know a lot of people on the Internet absolutely despise this noise, so keep that in mind.

Cherry MX Clears, they’re heavy. When I first took this keyboard out of the box, it was shockingly stiff. I was totally ready to say “pfft those people on the Internet are over-exaggerating as usual”, but they’re really completely different from the Browns and Blues that I’ve used in the past. Even so, I’ve gotten used to it in about a week, and I can definitely feel myself making many less accidental keypresses due to the added resistance. Can’t wait to get back to my QFR and see how feather-like the Browns feel in comparison.
In order to get this size they have to remove some keys. The function keys at the top really aren’t missed; it’s easy enough to hit fn+1 whenever you want the Help window to accidentally pop up. However, the arrow keys are a much bigger departure. Unfortunately not all of us live in a world where we can drive everything with Vim and the hjkl cluster, but the Pok3r lets you get close with its programming capability (more on that later).
If crazy programming isn’t your thing though, the Pok3r has a really awesome (and potentially undocumented?) trick: press ralt+spacebar, and the rightmost cluster of modifier keys will (with zero indication -__-) turn into an arrow cluster! Not only is there no indication that you’re in this weird arrow mode, but it turns itself off whenever the computer sleeps or you unplug your keyboard, so I find myself mashing on rctrl often before realizing that my cursor in fact isn’t moving to the right.
The backlighting is decent. It’s a very solid white, with maybe a slight cool tinge. Not enough for me to call it blue by any means though. It’s also pretty even, doesn’t seem like there are any pockets brighter than others. The effects are pretty basic, breathing and reactive modes are all you get. I quite like the grid-reactive mode my QFR had, as well as the explosion reactive modes you see on Ducky keyboards, neither of which are featured here. Unfortunately I’m running alternative keycaps that aren’t designed for backlighting, and it ends up looking pretty terrible.

Let’s talk about programming, one of the key features of this keyboard. The keyboard by default binds a lot of extra functionality under the function layer, which essentially means pressing fn plus a key on the keyboard to do extra stuff. I have stuff on my function layer noted in the image above by putting it on the front of the keycap.
This is cool, but the keyboard can do more. It has the concept of layers, modes that you can switch between. On each individual mode (except for the default mode), you can program any key to perform any sequence of keystrokes you want (up to 32 keystrokes I think). This of course lets you do the typical macro stuff (like pressing fn+b to spam your chat binds in Counterstrike), but it also lets you change any of the positions of individual keys. I’ve done the following to my keyboard:
- Put the Control key where the Capslock used to be
- Having
fn+lctrltrigger Capslock for those RARE OCCASIONS - Move the Function key to the bottom left of the keyboard, pushing everything else rightward and dropping the left Super (Windows) key
- Swapping the Backspace and Backslash keys
- Making
fn+hjkltrigger arrow key movement just like Vim
It’s taken a while to get used to these binds (you’ll still me entering strings of back\\\slashes from time to time when I reach too high) but for the most part I love the ability to relocate keys as I please. Plus, as this is all built-in to the keyboard rather than software-dependent, I can move between my laptops and my desktop computer and keep all of my binds. Unfortunately this isn’t true when I move between keyboards…

The one annoying thing about this is that you can’t reprogram the default layer. This is fine because the Pok3r gives you three additional layers that you can program. What sucks though is that there’s an LED indicator as to what layer you’re on underneath the spacebar. This is useful if you’re jumping between layers often, but if you’re like me and in layer two 99% of the time, that blue LED just stays on. I’ve actually had to put a piece of tape underneath the spacebar to block the LED. Much better afterwards (the photo above shows what it looks like before).
I love this keyboard. The layout is so conveniently small (it fits perfectly on top of my 13” laptop) and the customizability is probably as good as you can get without getting a keyboard that lets you reflash the firmware. With its aluminum body, the option of LEDs, and onboard programmability, it’s really hard to do any better in the non-custom 60% keyboard space. Plus, with the Pok3r RGB coming soon, you don’t even need to be tempted by Ducky’s offerings (given that Pok3r does their lighting as well as Ducky does theirs, and Ducky does do it really well).
Obviously if you need a numpad even TKLs probably terrify you, but if you’re a TKL user who’s really afraid of losing his arrow keys, I’d definitely say give the Pok3r a try. If the function layer ain’t servin’ you well, you’re just an ralt+spacebar away from getting your cluster back (and besides, who really uses the right modifier keys anyway?).
The Life Vermilion Notebook

Just a couple of weeks ago I was all about the 7″x10″-ness of the B5 size. After being chained to the monstrosity that is letter-size for so long, it was such a relief shaving off an inch or more off each side.
Well as they say, give ‘em an inch and they’ll take a mile.

This 32 sheet notebook is B6-sized (125 x 176 mm, 4.92 x 6.93 in), which is kind of a weird one, especially for us Americans out there. The best way I can describe it is that if it were any smaller, you could fit it in your pocket. A B6-sized notebook will not fit in anyone’s pants pockets, and my pants have pretty big pockets. Above I have the A5 Rhodia Webnotebook and the bit-smaller-than-A6 Moleskine for comparison.
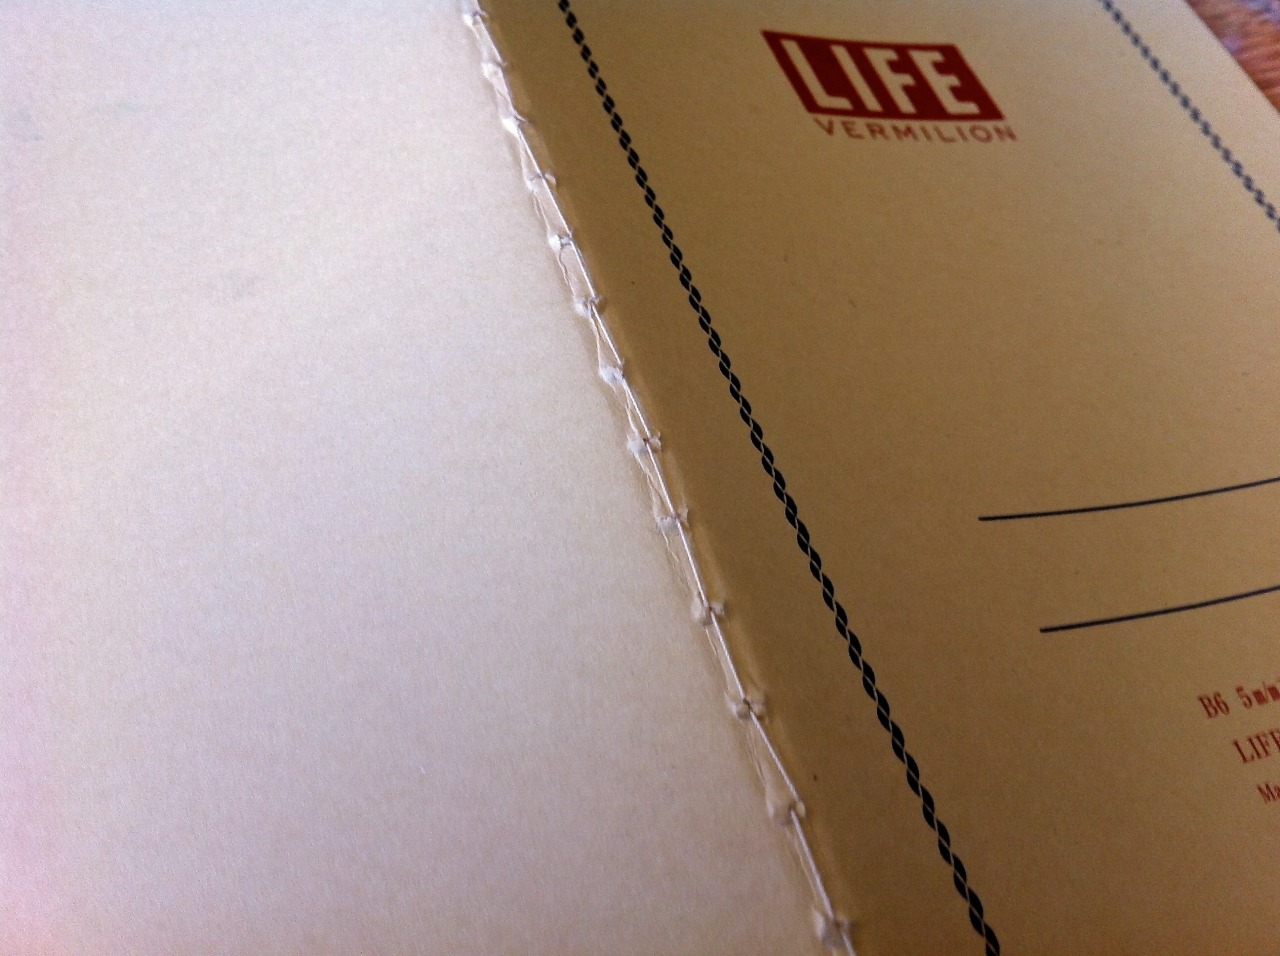
Unlike most of the Japanese notebooks that I’ve used that have tape over their bindings, this one exposes it to all. It’s a stitched binding, which helps a lot in laying flat (although it takes a bit more force to do so than I’m used to). The stitching itself is so bizarre, with the crooked lines and the huge bumps where the thread comes out. I don’t know how this will affect the lifespan of the stitching, but it’s certainly interesting to look at.

This is another one of those papers whose color is hard to capture on a bad camera. It’s advertised as a cream-colored paper, and that’s what it is, leaning hard towards yellow. The 5mm graph lining is where the notebook derives its name. It’s a very sharp, clean red-orange that in some lighting has hints of pink, almost like a coral. Combined with the cream paper, it all looks very soft, rather than the stark white and blue of most other graphs.

All of my fountain pens perform fantastically on this paper. Even the finicky Baystate Blue (albeit in Fine nib) doesn’t feather. The paper isn’t glassy smooth, but it’s not particularly textured either. If you enjoy smooth papers, this one will be fine with you.
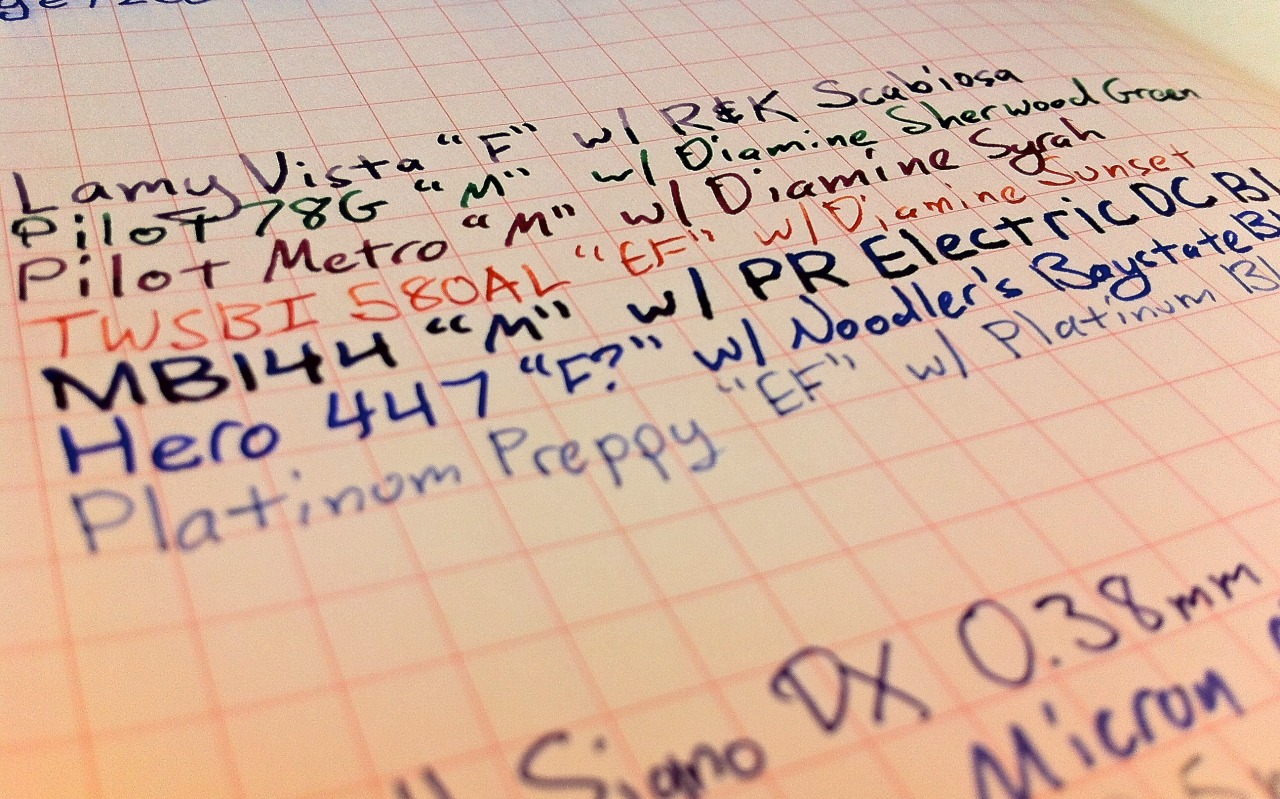
Note that due to the nature of colored papers, your inks may not look as bold and saturated as they would on stark white paper.
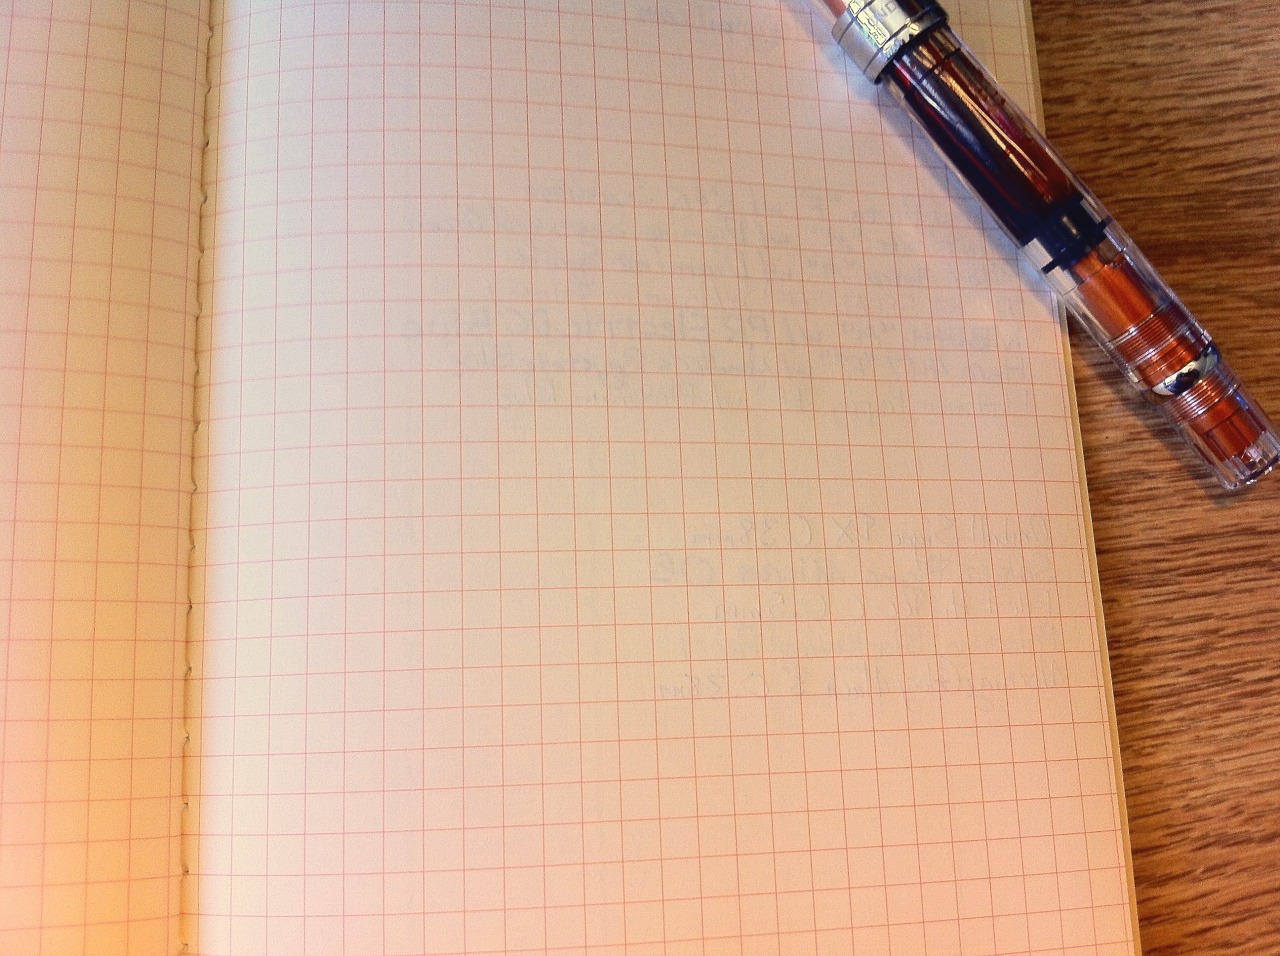
Bleedthrough is thankfully non-existent, and showthrough is really only there to the extent that my pens made markings in the 85gsm paper. Really, if you’re a fountain pen user (and you use the same range of nib sizes as me!!) this notebook will serve you fantastically.
I’m currently working through another notebook for class notes at the moment, but I cannot wait until I get to this one. The presentation is just lovely, and it really just performs way better than it should. It’s definitely going to take some getting used to with the smaller size, but fortunately I can’t see myself getting any smaller, with the next size down being the pocketable A6.
I bought this notebook at JetPens, but you can also find it at Nanami Paper. It also comes in lined for those who can’t handle the graph (don’t worry, sometimes I can’t handle it either).
Pens and pencils used:
- Lamy Vista F nib w/ Rohrer and Klinger Scabiosa
- Pilot 78G M nib w/ Diamine Sherwood Green
- Pilot Metropolitan M nib w/ Diamine Syrah
- TWSBI 580AL Orange EF nib w/ Diamine Sunset
- Montblanc 144 M nib w/ Private Reserve Electric DC Blue
- Hero 447 F nib w/ Noodler’s Baystate Blue
- Platinum Preppy EF nib w/ Platinum Blue (cartridge)
- Uniball Signo DX 0.38mm in Violet
- Sakura Pigma Micron 05 in Royal Blue
- Pilot Hi-Tec-C 0.5mm in Usuzumi Gray
- Palomino Blackwing Pearl in Standard Pencil Graphite Color
- Morning Glory Mach 3 0.38mm in Blue Black
- Uniball Kuru-Toga 0.5mm
The Banditapple Carnet Tablet

The Banditapple Carnet Tablet, a nifty almost-A5 32-sheet notebook that’s available in blank, lined, graph, and planner ruling.
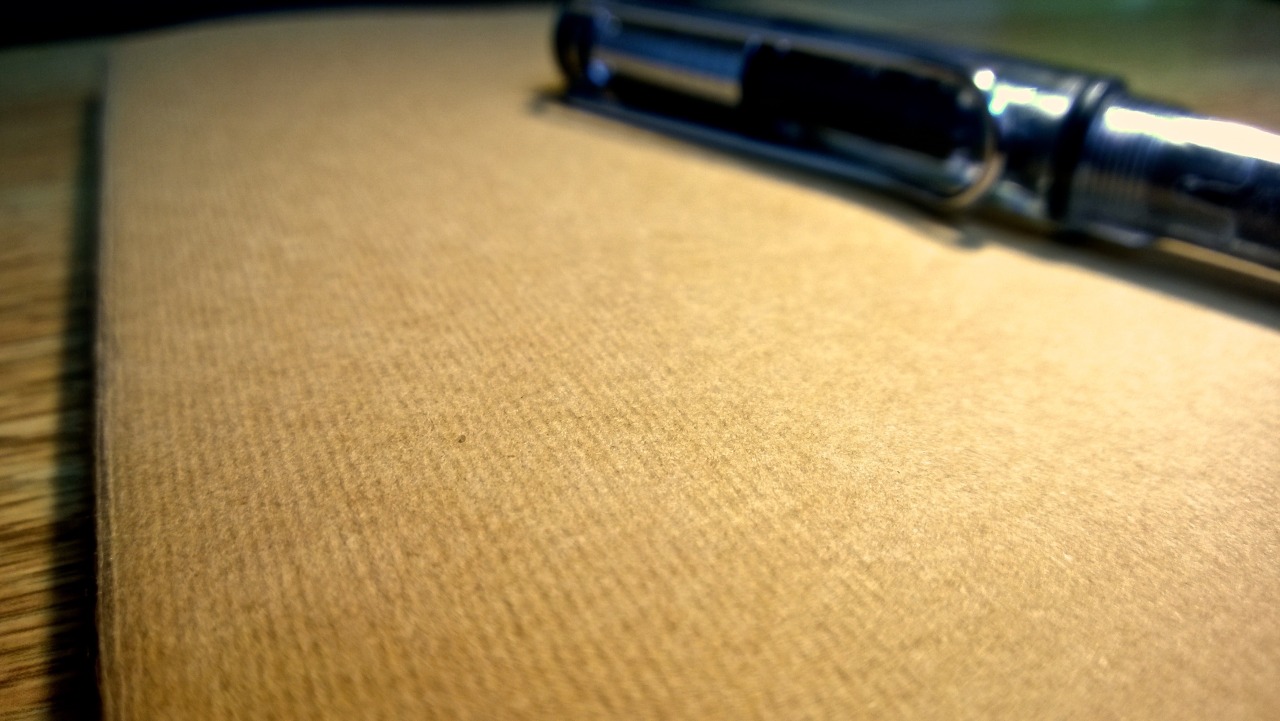
The cover is completely blank, giving full way to the awesome feel of the cover paper. I would almost describe is as hairy, and in the best way possible.
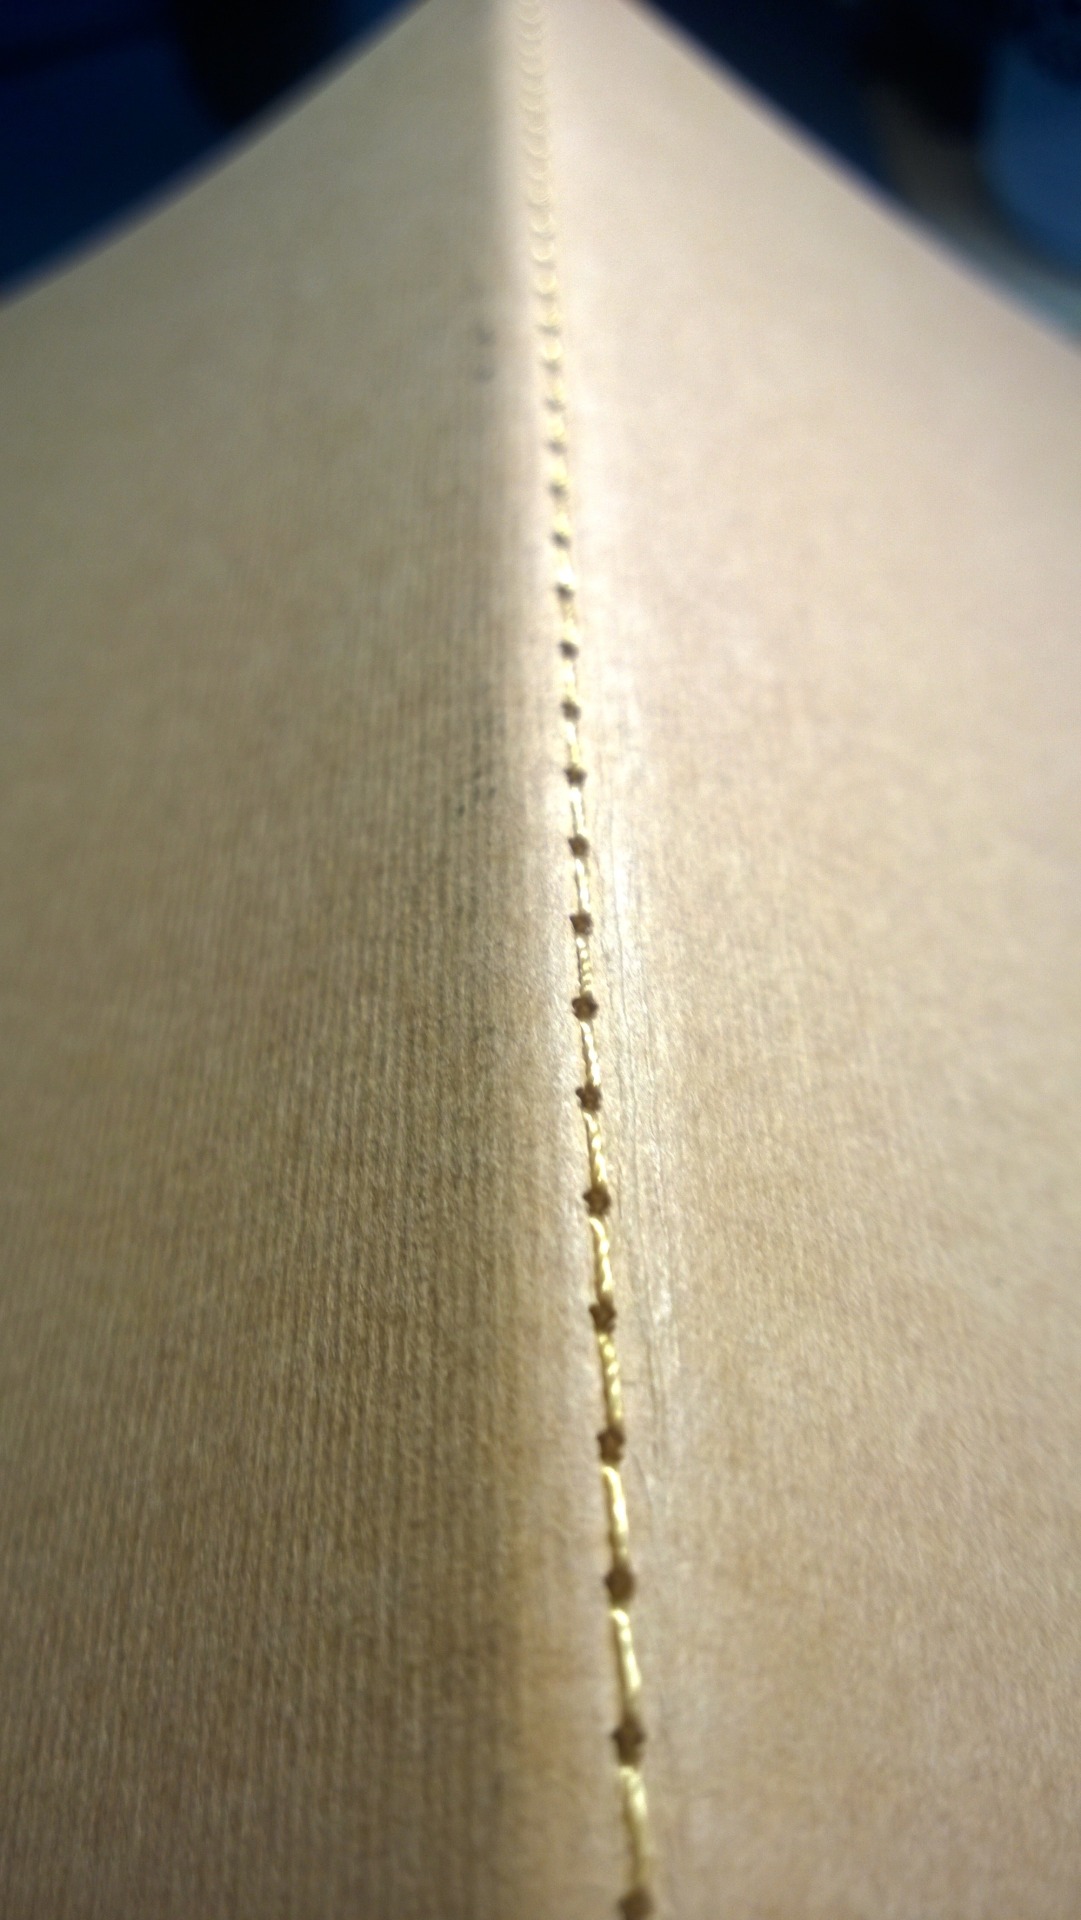
The notebook itself is held together by some very intricate stitching. Seriously, look how small those stitches are! Or whatever they’re called. They let the notebook lay completely flat (and even fold back on itself) once you put a little pressure in, and then with a little reverse pressure get back into its folded state (for the most part anyway, nobody’s perfect).
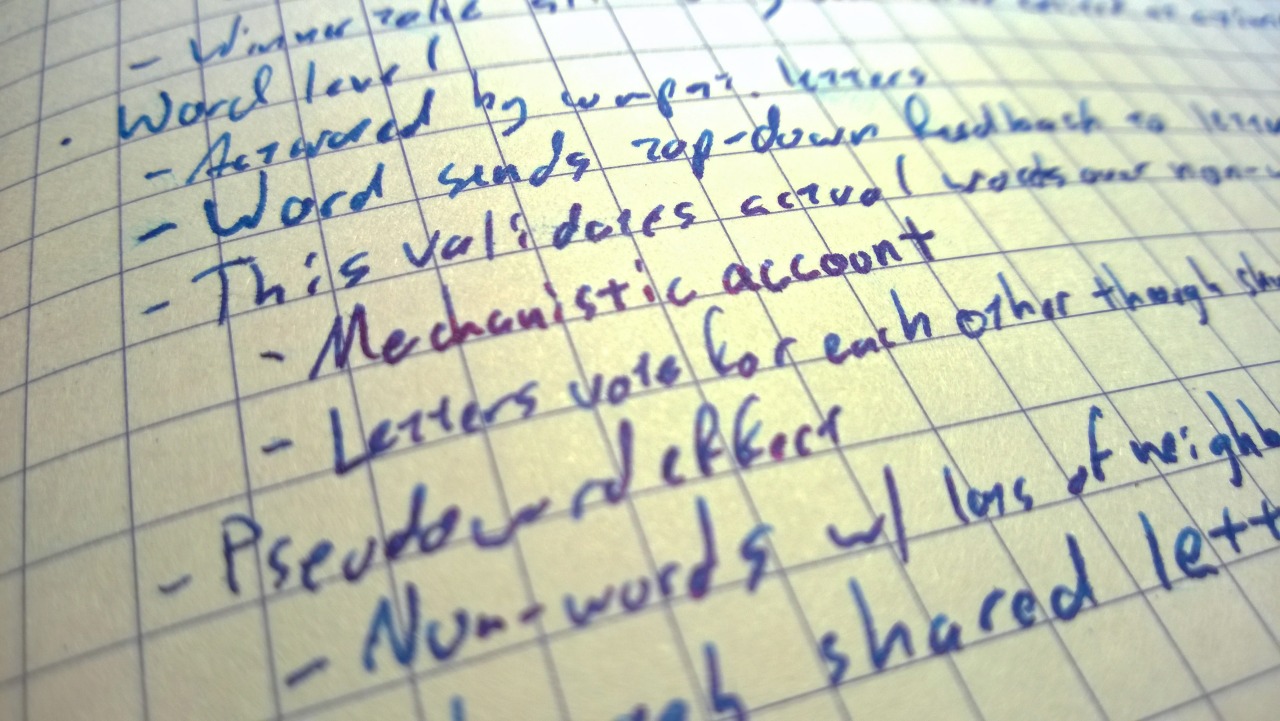
The paper is thick and textured. If you’re looking for glassy smooth paper, this is not your notebook. I personally like not having my pens slip away from underneath me so this works fine. Don’t worry though, it’s not even close to “rough”, so you’re never going to feel hampered by the texture—no paper ripping between the tines of your nib.
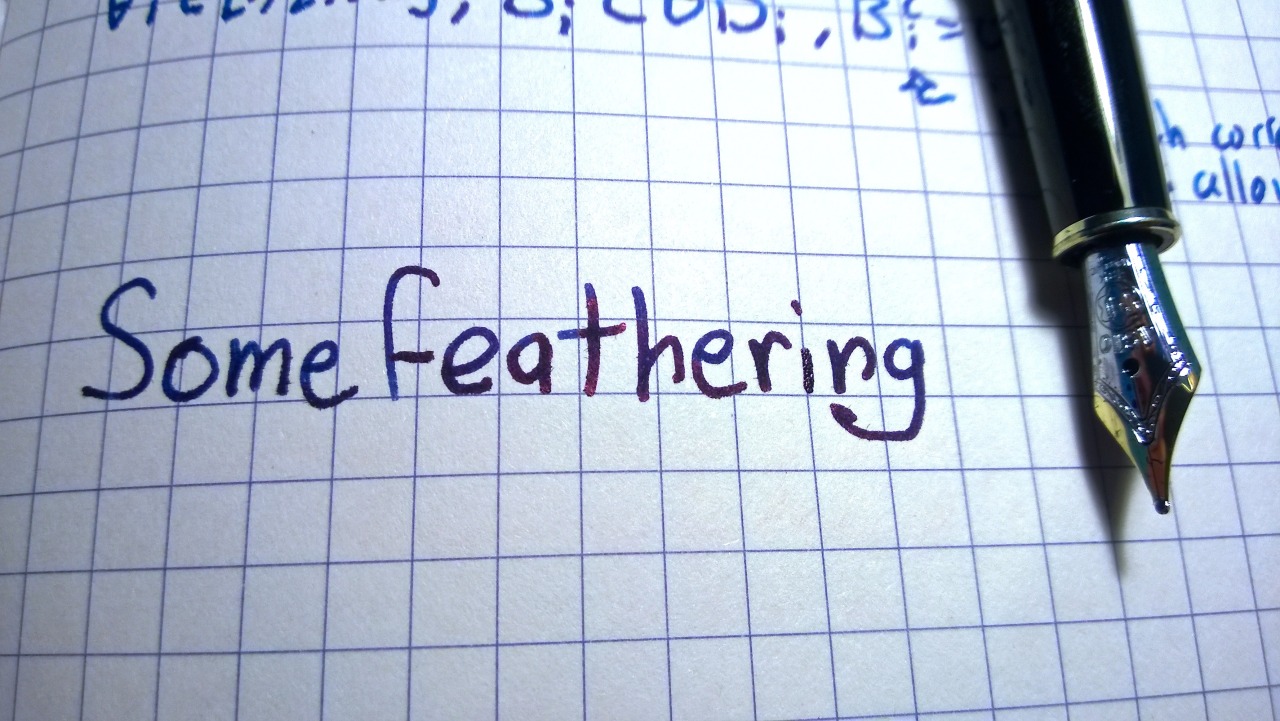
For the most part, my inky M-EF nibs do fine on this paper. However, there is some minor feathering from time to time, and when there isn’t, lines don’t look as sharp as they could be. I feel like the strange texture of the paper might have something to do with this. Of course, if you’re a gel pen or pencil user, you’ll have none of these minute problems. Lucky.
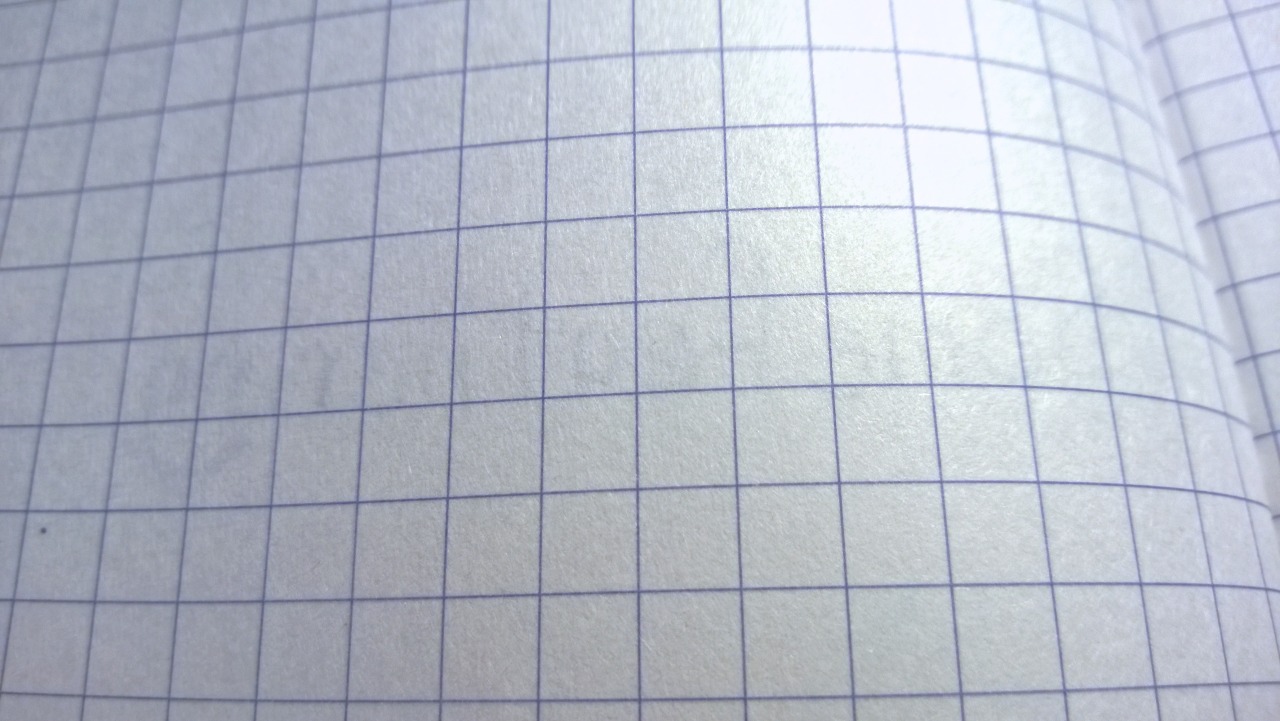
Due to the thickness of the paper (seriously, it is crazy thick, and feels waaay thicker than the 80gsm that it’s rated at), bleedthrough is nonexistant, and showthrough is just a whisper.
The paper is a bright white (even though the photos above might say otherwise) with medium blue lines in the graph version. I wish the lines were a tiny bit lighter, as they definitely make themselves apparent currently. I hear the lined and blank versions have cream paper, but I’ve never tried them.
Altogether I’m really enjoying this notebook for, well, taking notes. I’ve taken a liking to smaller notebooks as of late (because I can’t really change the size of my desks), and this one packs a lot into its small, completely unimprinted covers.
Really my biggest complaint is that this notebook is rather difficult to purchase as no US retailers currently carry it! Thankfully the great folks over at Banditapple let you order samples directly from them. Shipping is going to be from South Korea I believe though, so it’ll take a bit. Definitely worth the wait!
Pens used:
- Lamy Safari F nib w/ Iroshizuku Kon-Peki
- TWSBI 580 EF w/ Diamine Sunset
- Montblanc 144 M w/ Private Reserve Electric DC Blue
- Pilot Hi-Tec-C w/ 0.4mm Cherry Pink + Apple Green